
 Ink Brands
 How to Print Draft Mode to Save Ink and Toner

That two-page recipe, school worksheet or meeting agenda does not always need photo-quality printing. When the document is for your own reference, draft mode can use less ink or toner, print faster and help cartridges go further. Learning how to print draft mode is one of the simplest ways to reduce everyday printing costs without changing the document itself.
Draft mode is not the right choice for every job. It is best for internal paperwork, proofreading and disposable printouts, rather than client proposals, legal documents, presentations or images where colour accuracy and sharp detail matter. The setting can also look slightly different depending on your printer brand, computer and app.
What does draft mode do?
Draft mode tells the printer to prioritise speed and economy over the highest possible print quality. On an inkjet printer, this usually means the printer lays down less ink and may use a lower resolution. On a laser printer, it may reduce toner density or use an economy setting.
The result is generally lighter text and less detailed graphics, but it is still perfectly readable for many routine jobs. You may see the option labelled Draft, Fast Draft, Economy, EconoMode, Standard or Fast. Not every printer offers a setting called “draft mode”, but an economy or fast-quality option usually serves the same purpose.
Keep in mind that savings vary. A simple black-text document typically benefits more than a page full of photos or solid colour blocks. If a document is already designed with heavy backgrounds, large images or dark graphics, adjusting the print setting will help, but it will not remove the underlying ink demand.
How to print draft mode in Windows
On Windows, the draft setting is normally found in the printer preferences window. The exact labels depend on the printer driver, so look for a tab called Quality, Paper/Quality, Main, Printing Preferences or Advanced.
Print in draft mode from a document
Open the document you want to print, then press Ctrl + P or select Print from the file menu. Choose the correct printer, then select Printer Properties, Preferences or a similarly named button. Avoid assuming that the basic print screen shows all available settings - the quality controls are often one step further in.
In the printer settings window, find the print-quality option and select Draft, Fast Draft, Economy or Fast. If there is a quality slider, move it towards Speed or Economy. Confirm the change, then print your document.
Some programs remember the choice only for that print job. Others may retain it until you change it back. Before printing an important document later, check that the quality has not been left on draft.
Set draft mode as the Windows default
If most of your printing is internal paperwork, making draft mode the default can be worthwhile. Search for “Printers & scanners” in the Windows Start menu, select your printer, then open Printing preferences. Choose Draft, Economy or Fast in the relevant quality menu and save the setting.
This approach is convenient for a busy home office or small business, but it has a trade-off: every application may use the lower setting until you override it. A sensible middle ground is to leave the default on Standard and choose draft mode for high-volume, low-priority jobs.
How to print draft mode on a Mac
Mac print settings can look compact at first, but more options appear when you expand the print dialogue. Open your document, select File, then Print. If you see a shortened window, choose Show Details.
Look for the drop-down menu that may currently say Layout, then select Media & Quality, Quality & Media, Printer Features or a printer-brand-specific option. Choose Draft, Fast, Economy or the lowest suitable quality level, then select Print.
On some Mac setups, the quickest option is to choose a preset. Once you have selected draft settings, open the Presets menu and save them as a new preset, such as “Everyday Draft”. This lets you use economical settings for routine jobs without having to search through menus each time.
If your printer only shows generic Mac options and no quality setting, its full driver may not be installed. Downloading and installing the current driver from the printer manufacturer can reveal additional controls. However, newer printers that use Apple AirPrint may offer fewer detailed settings by design.
Finding draft settings on the printer itself
Many printers have an Eco, Economy or Quiet mode in their control-panel menus or companion app. This can be useful when you print from a mobile, tablet or USB drive, where computer-based preferences may not apply.
Look through Settings, Setup, Print Settings or Device Settings on the printer screen. The option may be called Eco Mode, Toner Save, Ink Save or EconoMode. Enable it, print a test page and assess whether the result is clear enough for your needs.
Be aware that printer-level Eco settings can affect every job sent to that device. In a shared office, it is often better to keep the printer’s default at normal quality and let individual users choose draft mode for their own working copies.
Why draft mode sometimes does not appear
If you cannot find draft mode, start by checking the printer driver. Windows may have installed a basic driver that handles printing but leaves out brand-specific controls. Installing the manufacturer’s full software package can restore settings such as draft quality, duplex printing, paper type and colour controls.
The application you are printing from also matters. A browser, PDF viewer or mobile app may show only a limited print dialogue. Try opening the printer’s Properties or System Dialogue option if available. Printing the same file from a different program can also expose more settings.
Some printers simply do not provide a true draft setting. In that case, select Standard or Fast quality, use black and white for text documents, and remove unnecessary colour images or page backgrounds before printing. For a laser printer, look for a toner-save or density setting instead.
Get better results while using less ink or toner
Draft mode works best alongside a few sensible document choices. Print only the pages you need, particularly with long emails, manuals and web pages. Use print preview to remove blank pages, and select two-sided printing when both sides of the sheet are suitable.
For working documents, black and white or greyscale printing can reduce colour-ink use. It will not always use less black ink, especially where the original contains rich colour graphics, but it avoids drawing from multiple colour cartridges. If you need only text, choose a plain font size and avoid coloured headings, full-page shading and decorative backgrounds.
Do not use draft mode to disguise a cartridge problem. Streaks, missing lines, patchy blocks or faded areas can point to low ink, low toner, a blocked inkjet printhead or a worn component. Run the printer’s nozzle check or cleaning cycle if needed, but avoid repeated cleaning cycles unless the printer indicates they are necessary - they use ink.
The paper you choose can make a difference too. Standard copy paper is usually ideal for draft documents. Lightweight or poor-quality paper may allow ink to show through, while glossy photo paper is not suited to economy printing. Match the paper type selected in the print settings to what is actually loaded in the tray.
When not to use draft mode
Draft mode is designed for documents with a short working life. Switch back to Standard or High quality for customer-facing paperwork, resumes, invoices, contracts, important school submissions and anything containing fine diagrams, barcodes or small text. A faint barcode may not scan reliably, and pale details can make a professional document look careless.
For photos, use the quality and paper settings recommended for the finish you want. Draft mode often creates muted colours, visible banding and weak detail, which can waste paper and ink if you need to reprint the image properly.
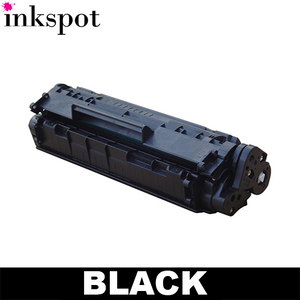
If you print frequently, the biggest savings usually come from combining sensible print settings with the right cartridge choice for your printer. Genuine cartridges suit users who want the manufacturer’s original product, while compatible options can be a cost-effective alternative for many everyday printing needs. Inkspot makes it easier to find cartridges by printer model, so you can order with confidence when it is time to replace supplies.
A quick check of print quality before you press Print can become a useful habit: draft for your desk, standard for sharing, and high quality only when the page genuinely needs it. Your cartridges, budget and recycling bin will all thank you.